
[EKS] EKS 업그레이드: Blue-Green 클러스터 업그레이드
서종호(가시다)님의 AWS EKS Workshop Study(AEWS) 7주차 학습 내용을 기반으로 합니다.
이 글에서 Green 클러스터 생성과 삭제는 직접 실습했지만, 워크로드 마이그레이션(Stateless/Stateful) 및 트래픽 전환은 ArgoCD 싱크 이슈로 재현하지 못했다. 해당 부분은 워크샵의 의도된 흐름을 기반으로 정리한다.
TL;DR
- Blue-Green 클러스터 업그레이드는 앞서 다룬 Blue-Green 노드 그룹 마이그레이션과 달리, 새 EKS 클러스터 자체를 생성하는 전략이다
- 여러 Kubernetes 마이너 버전을 한 번에 건너뛸 수 있다 (예: 1.30 → 1.32)
- 동일 VPC에 Green 클러스터를 생성하면 네트워크 연결, 보안 그룹, IAM 정책 등을 재활용할 수 있다
- Stateless 워크로드는 GitOps(ArgoCD)로 Green 클러스터에 동일하게 배포하고, Route 53 가중치 레코드로 트래픽을 전환한다
- Stateful 워크로드는 Amazon EFS 같은 공유 스토리지를 양쪽 클러스터에 마운트하여 데이터를 공유한 뒤 전환한다
- 마이그레이션 완료 후 Blue 클러스터를
terraform destroy로 폐기한다
개요
업그레이드 전략 글에서 정리한 것처럼, Blue-Green 클러스터 업그레이드는 새 버전의 EKS 클러스터를 별도로 생성하고, 워크로드를 마이그레이션한 뒤 기존 클러스터를 폐기하는 방식이다.
전체 흐름은 다음과 같다.
Green EKS 클러스터 생성 (1.32)
    ↓
애드온/컨트롤러 배포
    ↓
Stateless 워크로드 마이그레이션 (GitOps)
    ↓
Stateful 워크로드 마이그레이션 (공유 스토리지)
    ↓
트래픽 전환 (Route 53 가중치 레코드)
    ↓
Blue 클러스터 폐기
이 워크숍에서는 기존 Blue 클러스터(1.31)에서 Green 클러스터(1.32)로 업그레이드한다. In-Place와 달리 한 번에 여러 마이너 버전을 건너뛸 수 있는 것이 핵심이다.
동일 VPC에 Green 클러스터를 생성하는 이유
워크숍에서는 Blue 클러스터와 동일한 VPC에 Green 클러스터를 생성한다. 주요 이점은 다음과 같다.
- 네트워크 연결: 양쪽 클러스터 간 통신이 자연스럽게 가능하여 마이그레이션이 쉬워진다
- 리소스 재활용: NAT Gateway, VPN, Direct Connect 등 기존 VPC 리소스를 그대로 사용할 수 있다
- 보안 그룹: 일관된 보안 그룹 규칙을 유지할 수 있다
- IAM 정책: VPC에 스코핑된 IAM 역할과 리소스 정책을 재활용할 수 있다
- 서브넷 활용: 새로운 네트워크 대역을 추가로 할당할 필요가 없다
Green 클러스터 생성
Terraform 코드 구조
워크숍에서는 Green 클러스터용 Terraform 코드가 eksgreen-terraform/ 디렉토리에 별도로 준비되어 있다.
~$ ls -lrt eksgreen-terraform/

# 실행 결과
total 28
-rw-r--r--. 1 ec2-user ec2-user  542 Nov 17 17:29 versions.tf
-rw-r--r--. 1 ec2-user ec2-user   15 Nov 17 17:29 README.md
-rw-r--r--. 1 ec2-user ec2-user  464 Dec 16 13:40 variables.tf
-rw-r--r--. 1 ec2-user ec2-user 5510 Dec 16 13:40 addons.tf
-rw-r--r--. 1 ec2-user ec2-user 4552 Apr  7 19:50 base.tf
기존 Blue 클러스터의 terraform/ 디렉토리와 분리되어 있어, 독립적으로 관리할 수 있다. base.tf에 EKS 클러스터, 노드 그룹, Karpenter 설정이, addons.tf에 EKS 애드온, ArgoCD, ALB Controller 등이 정의되어 있다.
EFS ID 확인
Blue 클러스터 생성 시 함께 프로비저닝된 EFS 파일 시스템을 Green 클러스터에서도 사용한다. Stateful 워크로드 마이그레이션을 위해 EFS ID를 미리 확인해 둔다.
~$ export EFS_ID=$(aws efs describe-file-systems \
    --query "FileSystems[*].FileSystemId" --output text)
~$ echo $EFS_ID

# 실행 결과
fs-0aee63e2ea2608xxx
Terraform Apply
~$ cd ~/environment/eksgreen-terraform
~$ terraform init
~$ terraform plan -var efs_id=$EFS_ID
~$ terraform apply -var efs_id=$EFS_ID -auto-approve
terraform init으로 필요한 모듈과 프로바이더를 다운로드한다. 이 Terraform 코드에서 사용하는 주요 모듈은 다음과 같다.
| 모듈 | 버전 | 역할 |
|---|---|---|
terraform-aws-modules/eks/aws |
20.37.2 | EKS 클러스터, 노드 그룹 |
aws-ia/eks-blueprints-addons/aws |
1.23.0 | ArgoCD, Karpenter, ALB Controller 등 |
terraform-aws-modules/iam/aws |
5.60.0 | EBS CSI Driver IRSA |
terraform-aws-modules/kms/aws |
2.1.0 | 클러스터 암호화 키 |
terraform apply를 실행하면, 리소스가 순차적으로 생성된다. 전체 프로비저닝 흐름을 로그 기준으로 정리하면 다음과 같다.
1단계: EKS 클러스터 생성 (~8분)
module.eks.aws_eks_cluster.this[0]: Creating...
module.eks.aws_eks_cluster.this[0]: Still creating... [00m10s elapsed]
...
module.eks.aws_eks_cluster.this[0]: Still creating... [08m00s elapsed]
module.eks.aws_eks_cluster.this[0]: Creation complete after 8m13s [id=eksworkshop-eksctl-gr]
클러스터 생성 직후 OIDC Provider, Access Entry, 보안 그룹 태그 등이 설정된다.
2단계: 노드 그룹 생성 (~2분)
module.eks.module.eks_managed_node_group["initial"].aws_eks_node_group.this[0]: Creating...
module.eks.module.self_managed_node_group["default-selfmng"].aws_autoscaling_group.this[0]: Creating...
module.eks.module.self_managed_node_group["default-selfmng"].aws_autoscaling_group.this[0]: Creation complete after 15s
module.eks.module.eks_managed_node_group["initial"].aws_eks_node_group.this[0]: Creation complete after 1m48s
Managed Node Group(initial)과 Self-managed Node Group(default-selfmng)이 함께 생성된다.
3단계: 애드온 및 Helm 차트 설치 (~3분)
60초 대기(time_sleep) 후 EKS 애드온과 Helm 차트가 병렬로 설치된다.
module.eks_blueprints_addons.aws_eks_addon.this["coredns"]: Creation complete after 34s
module.eks_blueprints_addons.aws_eks_addon.this["aws-ebs-csi-driver"]: Creation complete after 45s
module.eks_blueprints_addons.aws_eks_addon.this["kube-proxy"]: Creation complete after 45s
module.eks_blueprints_addons.aws_eks_addon.this["vpc-cni"]: Creation complete after 1m5s
module.eks_blueprints_addons.module.argocd.helm_release.this[0]: Creation complete after 56s [id=argo-cd]
module.eks_blueprints_addons.module.karpenter.helm_release.this[0]: Creation complete after 25s [id=karpenter]
module.eks_blueprints_addons.module.aws_load_balancer_controller.helm_release.this[0]: Creation complete after 24s
module.eks_blueprints_addons.module.aws_efs_csi_driver.helm_release.this[0]: Creation complete after 1s
4단계: StorageClass 생성 및 완료
kubernetes_storage_class_v1.gp3: Creation complete after 1s [id=gp3]
kubernetes_storage_class_v1.efs: Creation complete after 1s [id=efs]

Apply complete! Resources: 92 added, 0 changed, 0 destroyed.
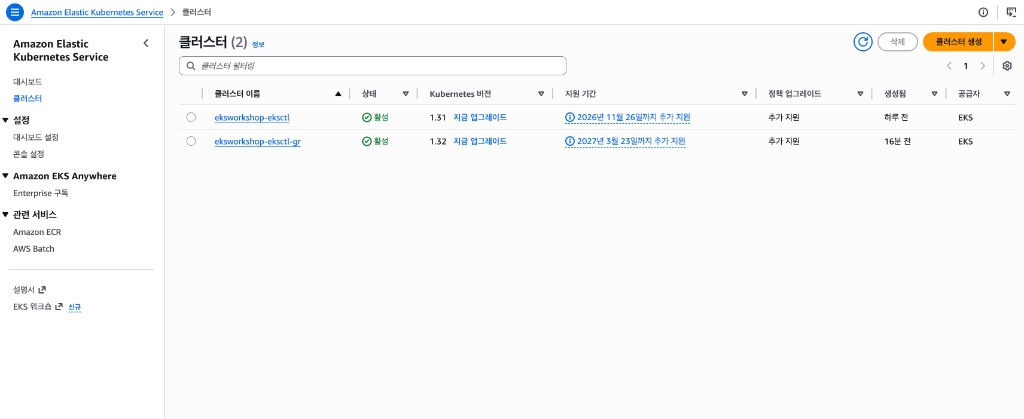
총 92개 리소스가 생성된다. EKS 콘솔에서 생성 진행 상태를 확인할 수 있다.
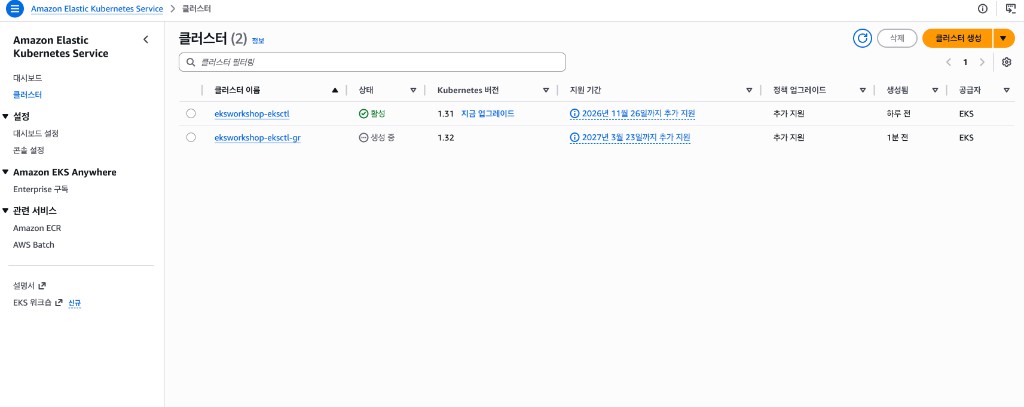
생성이 완료되면 두 클러스터가 모두 ‘활성’ 상태가 된다.
kubectl 컨텍스트 설정
두 클러스터를 쉽게 구분하기 위해 alias를 설정한다.
~$ aws eks --region ${AWS_REGION} update-kubeconfig \
    --name ${EKS_CLUSTER_NAME} --alias blue

# 실행 결과
Updated context blue in /home/ec2-user/.kube/config

~$ kubectl config use-context blue

# 실행 결과
Switched to context "blue".

~$ aws eks --region ${AWS_REGION} update-kubeconfig \
    --name ${EKS_CLUSTER_NAME}-gr --alias green

# 실행 결과
Added new context green to /home/ec2-user/.kube/config

~$ kubectl config use-context green

# 실행 결과
Switched to context "green".
이후 --context blue / --context green 옵션으로 두 클러스터를 자유롭게 오갈 수 있다.
Green 클러스터 확인
~$ kubectl get nodes --context green

# 실행 결과
NAME                                        STATUS   ROLES    AGE     VERSION
ip-10-0-13-16.us-west-2.compute.internal    Ready    <none>   9m30s   v1.32.13-eks-40737a8
ip-10-0-22-139.us-west-2.compute.internal   Ready    <none>   9m31s   v1.32.13-eks-40737a8
ip-10-0-25-250.us-west-2.compute.internal   Ready    <none>   10m     v1.32.13-eks-40737a8
ip-10-0-36-128.us-west-2.compute.internal   Ready    <none>   10m     v1.32.13-eks-40737a8
4개 노드가 v1.32.13으로 프로비저닝되어 있다. -o wide --show-labels로 상세 정보를 확인하면, Managed Node Group(initial)과 Self-managed Node Group이 함께 구성되어 있음을 알 수 있다.
| 노드 | 노드 그룹 | AZ | 인스턴스 | OS |
|---|---|---|---|---|
| ip-10-0-13-16 | Managed (initial) |
us-west-2a | m5.large | AL2023 |
| ip-10-0-22-139 | Managed (initial) |
us-west-2b | m5.large | AL2023 |
| ip-10-0-25-250 | Self-managed (OrdersMNG) |
us-west-2b | m5.large | AL2023 |
| ip-10-0-36-128 | Self-managed (OrdersMNG) |
us-west-2c | m5.large | AL2023 |
Blue 클러스터와 동일한 구성(Managed + Self-managed)이 Green 클러스터에도 재현되어 있다.
~$ helm list -A --kube-context green

# 실행 결과 (주요 항목)
NAME                            NAMESPACE       STATUS    CHART                                APP VERSION
argo-cd                         argocd          deployed  argo-cd-5.55.0                       v2.10.0
aws-efs-csi-driver              kube-system     deployed  aws-efs-csi-driver-2.5.6             1.7.6
aws-load-balancer-controller    kube-system     deployed  aws-load-balancer-controller-1.7.1   v2.7.1
karpenter                       karpenter       deployed  karpenter-1.0.0                      1.0.0
metrics-server                  kube-system     deployed  metrics-server-3.12.0                0.7.0
ArgoCD, EFS CSI Driver, ALB Controller, Karpenter, Metrics Server 등 주요 애드온이 모두 설치되어 있다.
Stateless 워크로드 마이그레이션
Stateless 워크로드는 영속 데이터가 클러스터에 묶여 있지 않으므로, Green 클러스터에 동일한 워크로드를 배포하고 트래픽을 전환하면 된다.
GitOps를 활용한 배포
이 워크숍에서는 CodeCommit의 eks-gitops-repo를 Single Source of Truth로 사용하고, ArgoCD가 이를 Green 클러스터에 동기화하는 구조다.
핵심 절차:
- GitOps 저장소에서
green브랜치를 생성한다
~$ cd ~/environment/eks-gitops-repo
~$ git switch -c green
- 1.32에 맞게 매니페스트를 수정한다. 예를 들어 Karpenter EC2NodeClass의 AMI, IAM 역할, 보안 그룹을 Green 클러스터에 맞게 변경한다
# 1.32용 AL2023 AMI 조회
~$ export AL2023_132_AMI=$(aws ssm get-parameter \
    --name /aws/service/eks/optimized-ami/1.32/amazon-linux-2023/x86_64/standard/recommended/image_id \
    --region ${AWS_REGION} --query "Parameter.Value" --output text)
- Deprecated API를 확인하고 수정한다. pluto 같은 도구로 감지할 수 있다
~$ pluto detect-files -d ~/environment/eks-gitops-repo/

# 실행 결과 예시
NAME   KIND                      VERSION               REPLACEMENT      REMOVED   DEPRECATED
ui     HorizontalPodAutoscaler   autoscaling/v2beta2   autoscaling/v2   false     true
# kubectl convert로 Deprecated API 변환
~$ kubectl convert -f apps/ui/hpa.yaml \
    --output-version autoscaling/v2 -o yaml > apps/ui/tmp.yaml \
    && mv apps/ui/tmp.yaml apps/ui/hpa.yaml
- ArgoCD App of Apps의
targetRevision을green브랜치로 변경한다
~$ sed -i 's/targetRevision: main/targetRevision: green/' app-of-apps/values.yaml
~$ git add . && git commit -m "1.32 changes"
~$ git push -u origin green
- Green 클러스터의 ArgoCD에 CodeCommit 저장소를 등록하고, App of Apps를 생성한다
~$ argocd app create apps \
    --repo <codecommit-repo-url> \
    --path app-of-apps \
    --dest-server https://kubernetes.default.svc \
    --sync-policy automated \
    --revision green \
    --server ${ARGOCD_SERVER_GR}
배포가 완료되면 argocd app list로 모든 애플리케이션의 상태를 확인할 수 있다.
트래픽 전환
워크로드 배포 후 트래픽을 Blue에서 Green으로 전환해야 한다. 워크숍에서는 Amazon Route 53 가중치 레코드(Weighted Records)를 사용하는 방법을 안내한다.
Route 53 Hosted Zone이 필요하므로, 워크숍에서도 트래픽 전환은 이론적 안내만 제공한다.
| Blue 가중치 | Green 가중치 | 트래픽 분배 |
|---|---|---|
| 100 | 0 | 전량 Blue |
| 50 | 50 | 균등 분배 |
| 0 | 100 | 전량 Green |
Ingress 리소스에 다음 annotation을 설정하고, external-dns를 통해 Route 53 레코드를 관리한다.
external-dns.alpha.kubernetes.io/set-identifier: <cluster-name>
external-dns.alpha.kubernetes.io/aws-weight: '<weight>'
가중치를 점진적으로 조정하면서 Green 클러스터의 정상 동작을 확인한 뒤, 최종적으로 100%를 Green으로 전환한다.
Stateful 워크로드 마이그레이션
Stateful 워크로드는 영속 데이터의 마이그레이션이 핵심이다. 워크숍에서는 Amazon EFS를 공유 스토리지로 사용하여 Blue/Green 양쪽 클러스터에서 동일한 파일 시스템에 접근하는 방식을 시연한다.
워크숍의 시연 흐름
- Blue 클러스터에 StatefulSet 배포: nginx 파드가 EFS를 마운트하여 정적 파일을 생성한다
apiVersion: apps/v1
kind: StatefulSet
metadata:
  name: efs-example
spec:
  serviceName: "efs-example"
  replicas: 1
  selector:
    matchLabels:
      app: efs-example
  template:
    spec:
      containers:
      - name: app
        image: nginx:latest
        volumeMounts:
        - name: efs-storage
          mountPath: /usr/share/nginx/html
  volumeClaimTemplates:
  - metadata:
      name: efs-storage
    spec:
      accessModes: ["ReadWriteMany"]
      storageClassName: efs
      resources:
        requests:
          storage: 1Gi
-
Green 클러스터에 동일한 StatefulSet 배포: 동일한 EFS 파일 시스템을 마운트하면, Blue에서 생성한 파일이 Green에서도 접근 가능하다
-
Blue 클러스터의 StatefulSet 삭제: 마이그레이션 완료 후 Blue 쪽을 정리한다
~$ kubectl delete statefulset efs-example --context blue
실제 운영 환경에서는 EFS 외에도 EBS 볼륨, RDS, DynamoDB 등 다양한 스토리지가 사용될 수 있다. 핵심 원칙은 동일하다: 양쪽 클러스터에서 데이터에 접근할 수 있는 상태를 만든 뒤, 검증 후 전환하는 것이다.
Blue 클러스터 폐기
모든 워크로드 마이그레이션과 트래픽 전환이 완료되면, Blue 클러스터를 폐기한다.
~$ cd ~/environment/terraform
~$ terraform destroy -auto-approve
Blue 클러스터를 즉시 삭제하기보다, 일정 기간 모니터링 후 문제가 없는 것을 확인한 뒤 폐기하는 것을 권장한다. 문제 발생 시 트래픽을 다시 Blue로 전환할 수 있는 롤백 여지를 남겨두기 위함이다.
폐기 후에는 Green 클러스터가 유일한 운영 클러스터가 된다. 필요에 따라 Green 클러스터의 이름이나 설정을 정리하면 된다.
In-Place vs Blue-Green 클러스터: 실습 비교
이 시리즈에서 두 전략을 모두 실습해 보았다. 주요 차이를 정리하면 다음과 같다.
| 항목 | In-Place (앞선 실습) | Blue-Green 클러스터 (이 글) |
|---|---|---|
| 버전 변경 | 1.30 → 1.31 (1단계) | 1.31 → 1.32 (N단계 가능) |
| API 엔드포인트 | 유지 | 변경 (새 클러스터) |
| 롤백 | Control Plane 롤백 불가 | Blue로 트래픽 재전환 |
| 다운타임 | 롤링 업데이트 중 최소화 | 트래픽 전환 시점에 최소화 |
| 비용 | 기존 인프라만 | 이중 클러스터 운영 비용 |
| 복잡도 | Terraform 변수 변경 | 새 클러스터 + 워크로드 마이그레이션 + 트래픽 전환 |
정리
Blue-Green 클러스터 업그레이드는 새 EKS 클러스터를 만들고, 워크로드를 마이그레이션한 뒤, 기존 클러스터를 폐기하는 전략이다.
핵심 포인트를 정리하면 다음과 같다.
- 여러 버전을 한 번에 건너뛸 수 있다: In-Place의 “1 마이너씩” 제약이 없다
- 안전한 롤백: 문제 발생 시 트래픽을 Blue로 되돌리면 된다
- 동일 VPC 활용: 네트워크, 보안 그룹, IAM 등을 재활용하여 복잡도를 줄일 수 있다
- GitOps가 핵심: Single Source of Truth에서 워크로드를 관리하면 새 클러스터에 동일한 환경을 빠르게 재현할 수 있다
- Stateful 워크로드는 별도 고려: EFS, S3, 외부 DB 등 공유 가능한 스토리지를 활용해야 한다
- Blue 폐기 전 충분한 모니터링: 일정 기간 양쪽 클러스터를 유지하면서 Green의 안정성을 확인한다
참고 링크
- Amazon EKS Blue/Green Cluster Migration
- Amazon Route 53 Weighted Routing
- external-dns for AWS
- Amazon EFS CSI Driver
- Pluto - Deprecated API Finder
- EKS Upgrade Workshop - Blue-Green Cluster Upgrades


댓글남기기